*ad eccezione di alcuni paesi americani, offerta riservata ai privati (vedi condizioni)
Menu
Procedura di taratura dell'leGPSBip
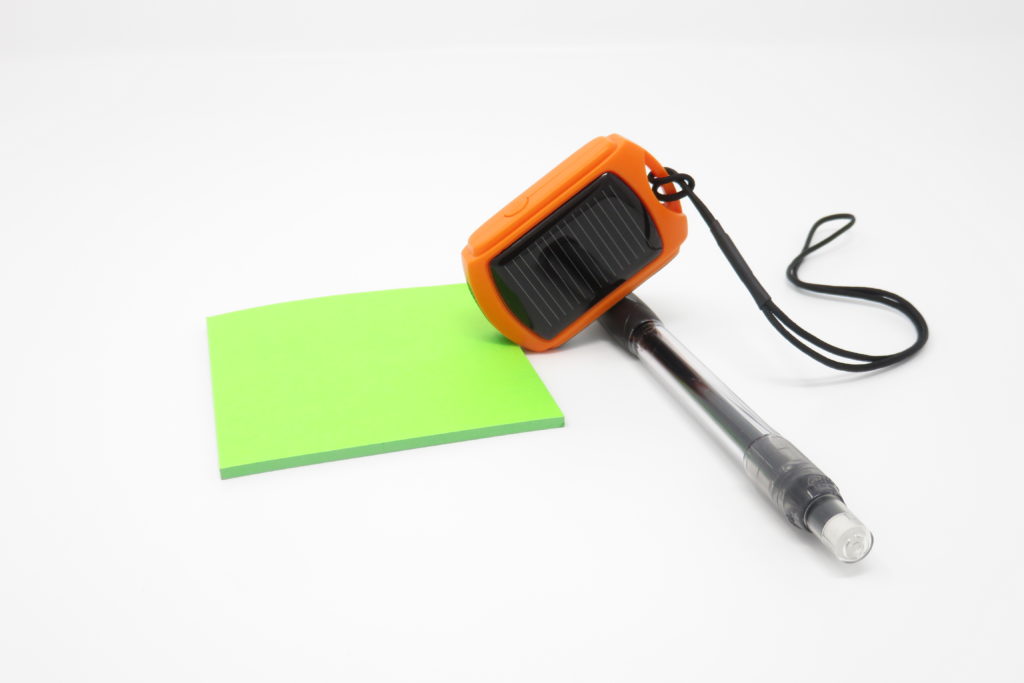
Il vario istantaneo richiede la calibrazione dei sensori da parte dell'utente per ottenere prestazioni ottimali, con l'aiuto di un oggetto per ottenere l'orientamento necessario. Può trattarsi di una penna, di un libro, di una gomma o di qualsiasi altro oggetto non scivoloso.
La procedura di calibrazione si avvia automaticamente quando il software viene aggiornato alla versione V3.x.
Attenzione: eseguire la procedura di calibrazione su una superficie perfettamente stabile, in un ambiente tranquillo (senza vibrazioni, musica o altri movimenti...).
PROCEDURA
Una volta completato l'aggiornamento, procedere come segue:
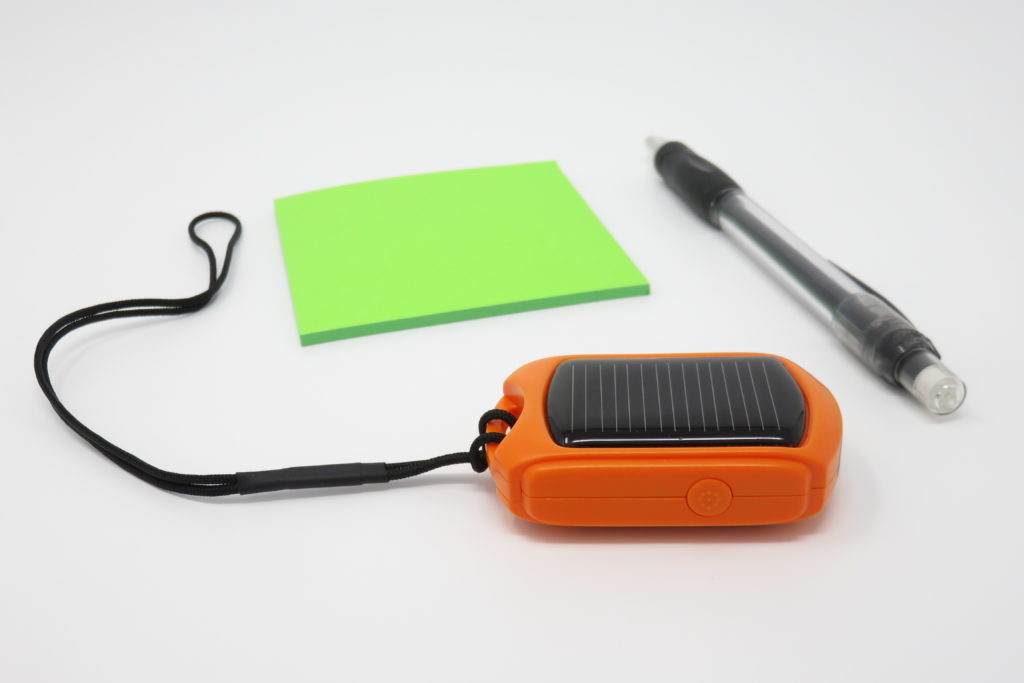
FASE 1
Accendere il dispositivo e attendere che annunci "procedura di calibrazione".
Posare il dispositivo in orizzontale, con la cella solare rivolta verso l'alto.
Rimanete fermi e aspettate la convalida.
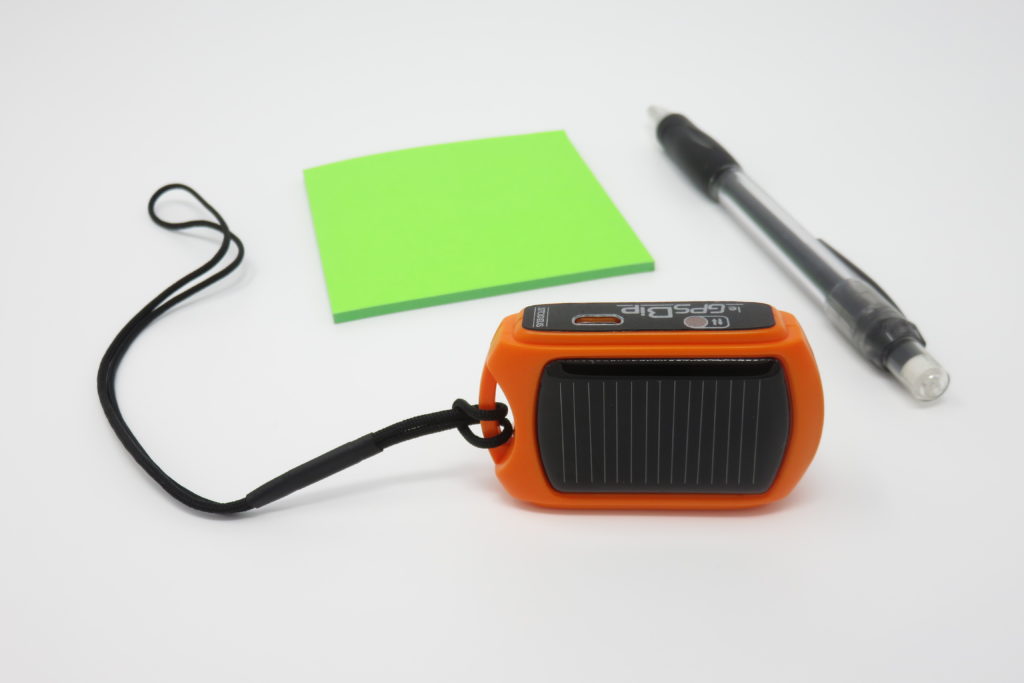
FASE 2
Cambiare posizione: posizionarlo con la porta USB rivolta verso l'alto. (Attenzione: non premere il pulsante).
Rimanete fermi e aspettate la convalida.
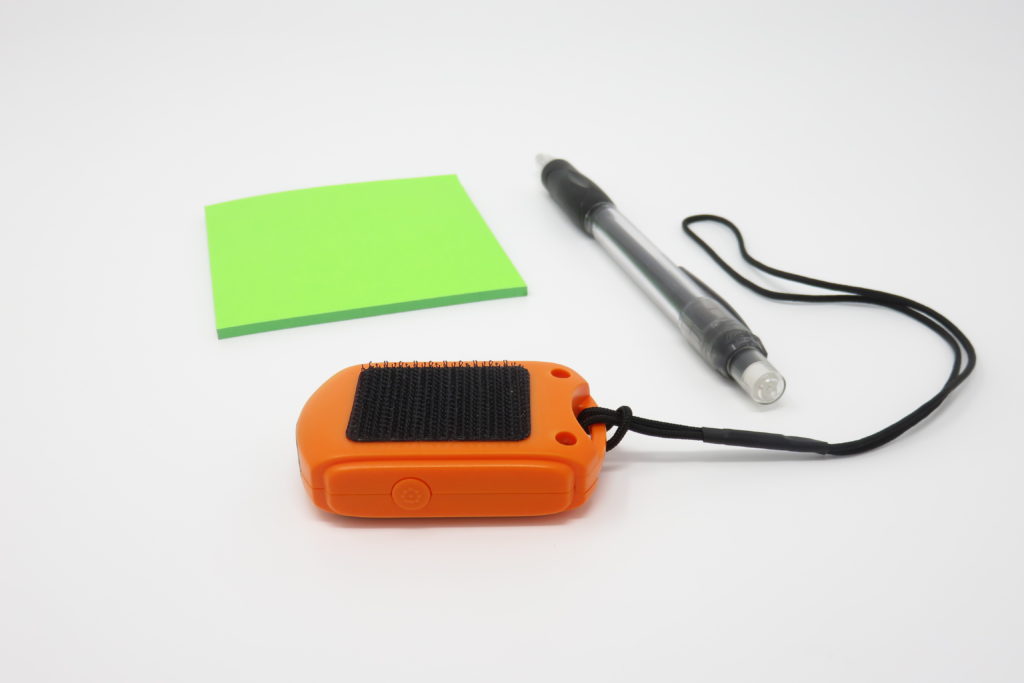
FASE 3
Cambiare posizione: posizionarlo con il velcro rivolto verso l'alto.
Rimanete fermi e aspettate la convalida.
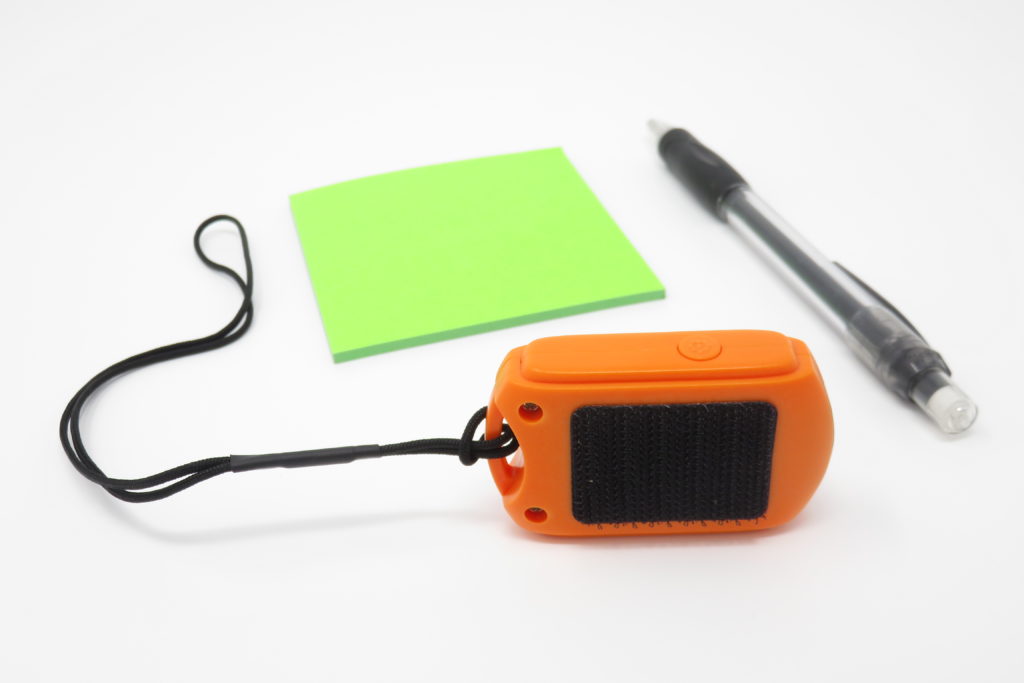
FASE 4
Cambiare posizione: posizionarlo con il pulsante rivolto verso l'alto.
Rimanete fermi e aspettate la convalida.
PASSO 5
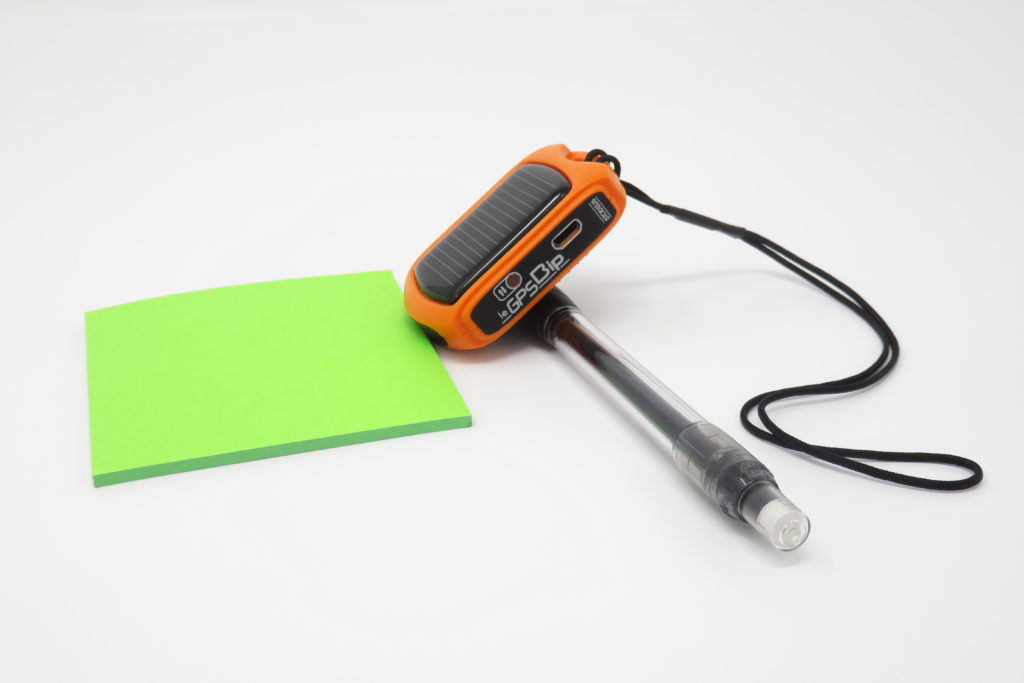
Con un oggetto (ad esempio una penna o una gomma), posizionarlo ad un angolo di 45° con la cella solare e l'impugnatura rivolte verso l'alto (si consiglia di utilizzare un secondo oggetto per evitare che scivoli).
Rimanete fermi e aspettate la convalida.
FASE 6
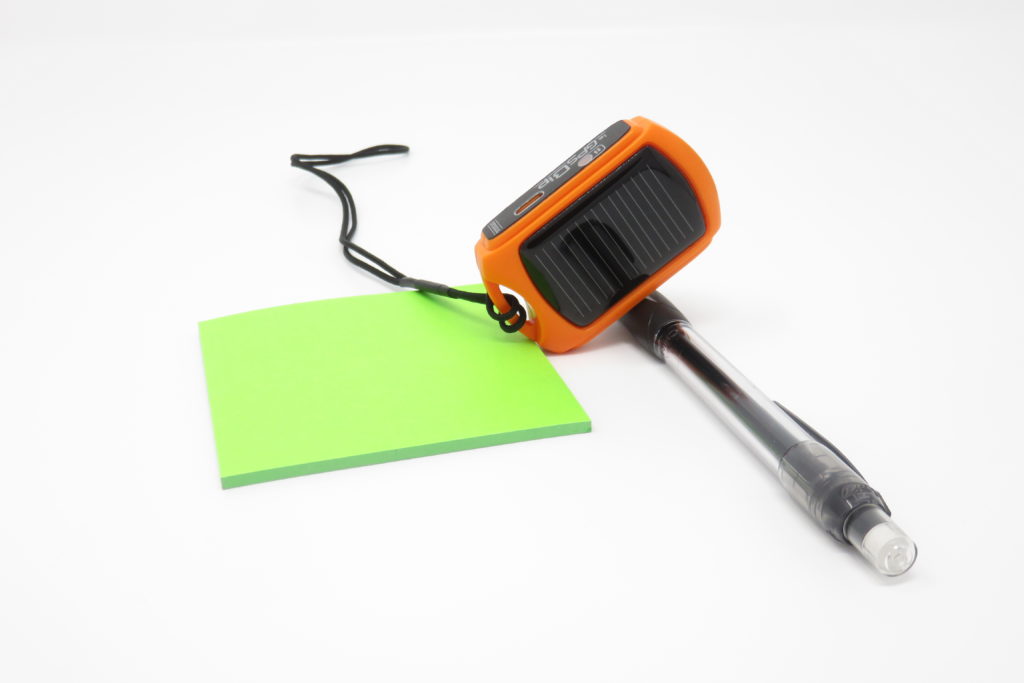
Cambiare posizione: posizionare a 45° con la cella solare e la griglia rivolte verso l'alto.
Rimanete fermi e aspettate la convalida.
PASSO 7
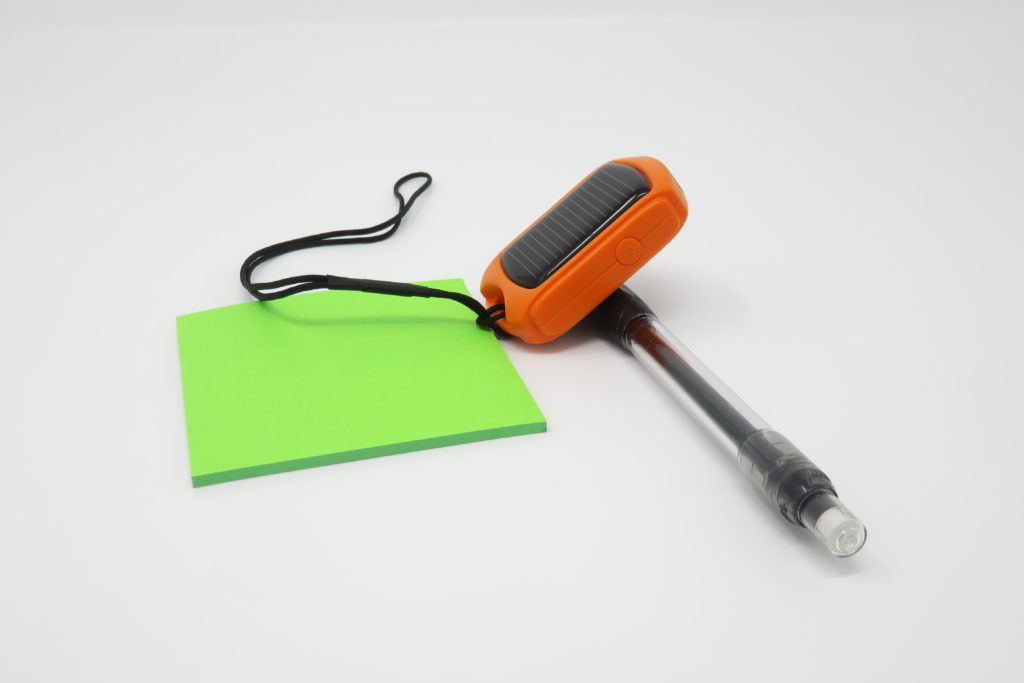
Cambiare posizione: posizionarlo con un angolo di 45° con la porta USB e la griglia rivolte verso l'alto.
Rimanete fermi e aspettate la convalida.
FASE 8
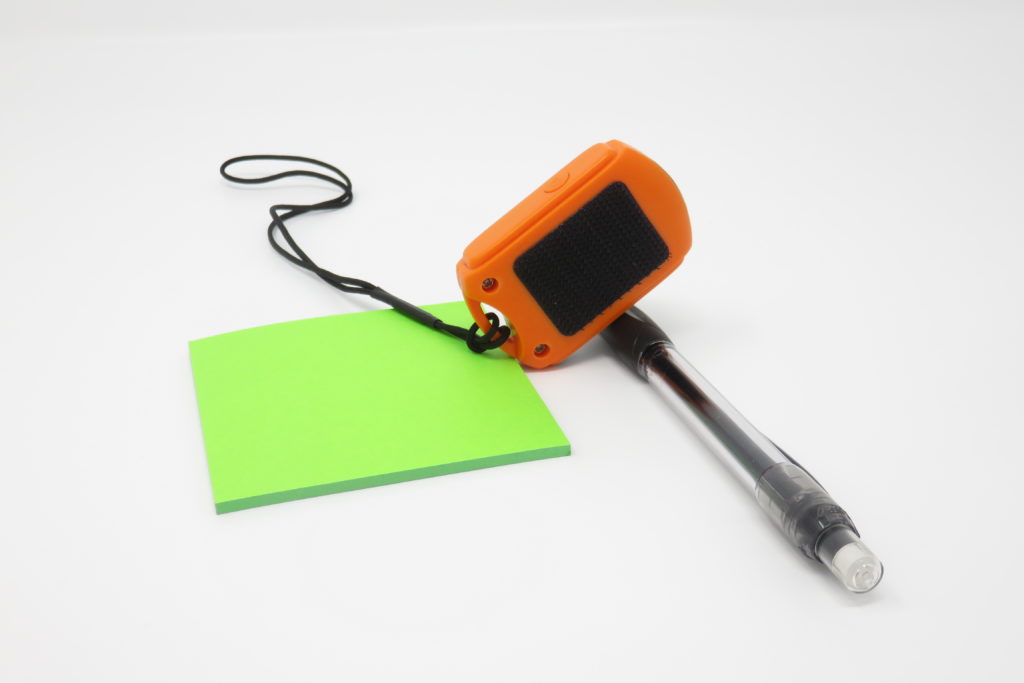
Modifica della posizione: posizionarlo a 45° con la manopola e la griglia rivolte verso l'alto.
Rimanete fermi e aspettate la convalida.
FASE 9
Cambio di posizione: posizionare a 45° con la manopola e l'impugnatura rivolte verso l'alto.
Rimanete fermi e aspettate la convalida.
FASE 10: ripetere le FASI da 1 a 9
Una volta completati questi passaggi, ricominciare la procedura di convalida.
Infine, vi faremo sapere se la calibrazione ha avuto successo. Buon volo!