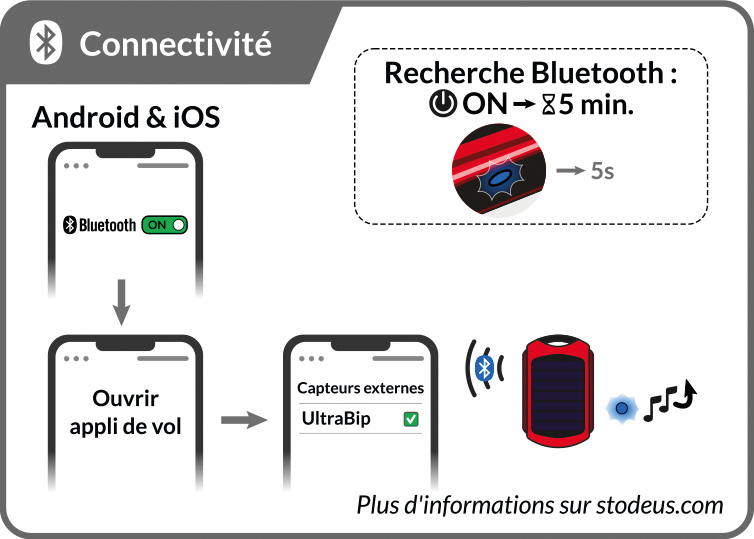


Afin d’établir la connexion entre l’UltraBip et votre appli de vol, il n’y a pas besoin d’appairer l’UltraBip à votre smartphone dans le menu Bluetooth.
Retrouvez ici les guides de connectivité Bluetooth par app de vol.
Oui ! L’UltraBip peut être connecté via Bluetooth aux smartphones et tablettes Android et iOS !
Le transfert de données vers l’app de vol ne peut pas se faire par USB, car le Bluetooth est plus économe en énergie. De plus, le Bluetooth offre une connexion plus fiable par rapport à l’utilisation d’une connectique physique qui pourrait se détériorer. Cette méthode laisse également le port USB du téléphone libre pour une powerbank.
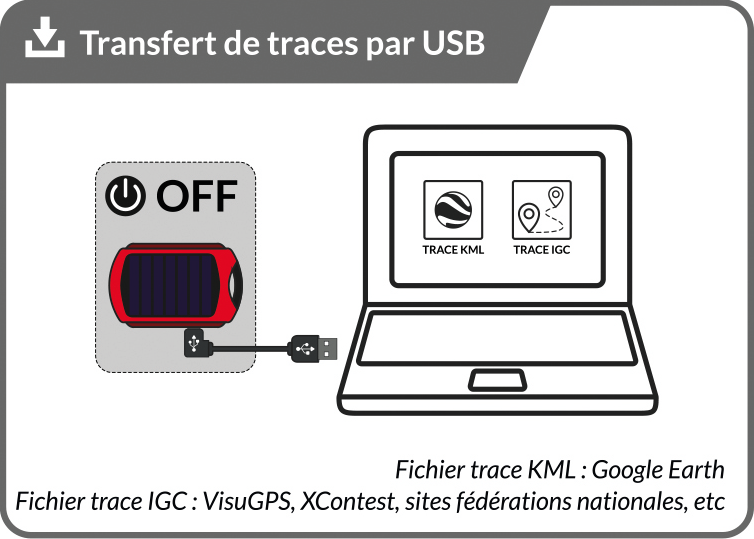
Oui, à condition d’avoir activé l’enregistrement de trace dans le Configurator.
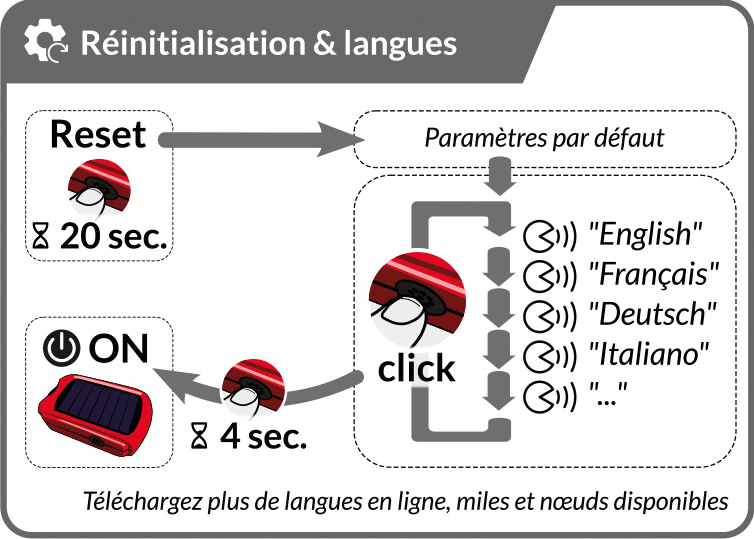
Cliquer ici pour aller sur la page de téléchargement des voicepacks.
Il doit toujours y avoir au moins un pack de langue dans le dossier “voices”.
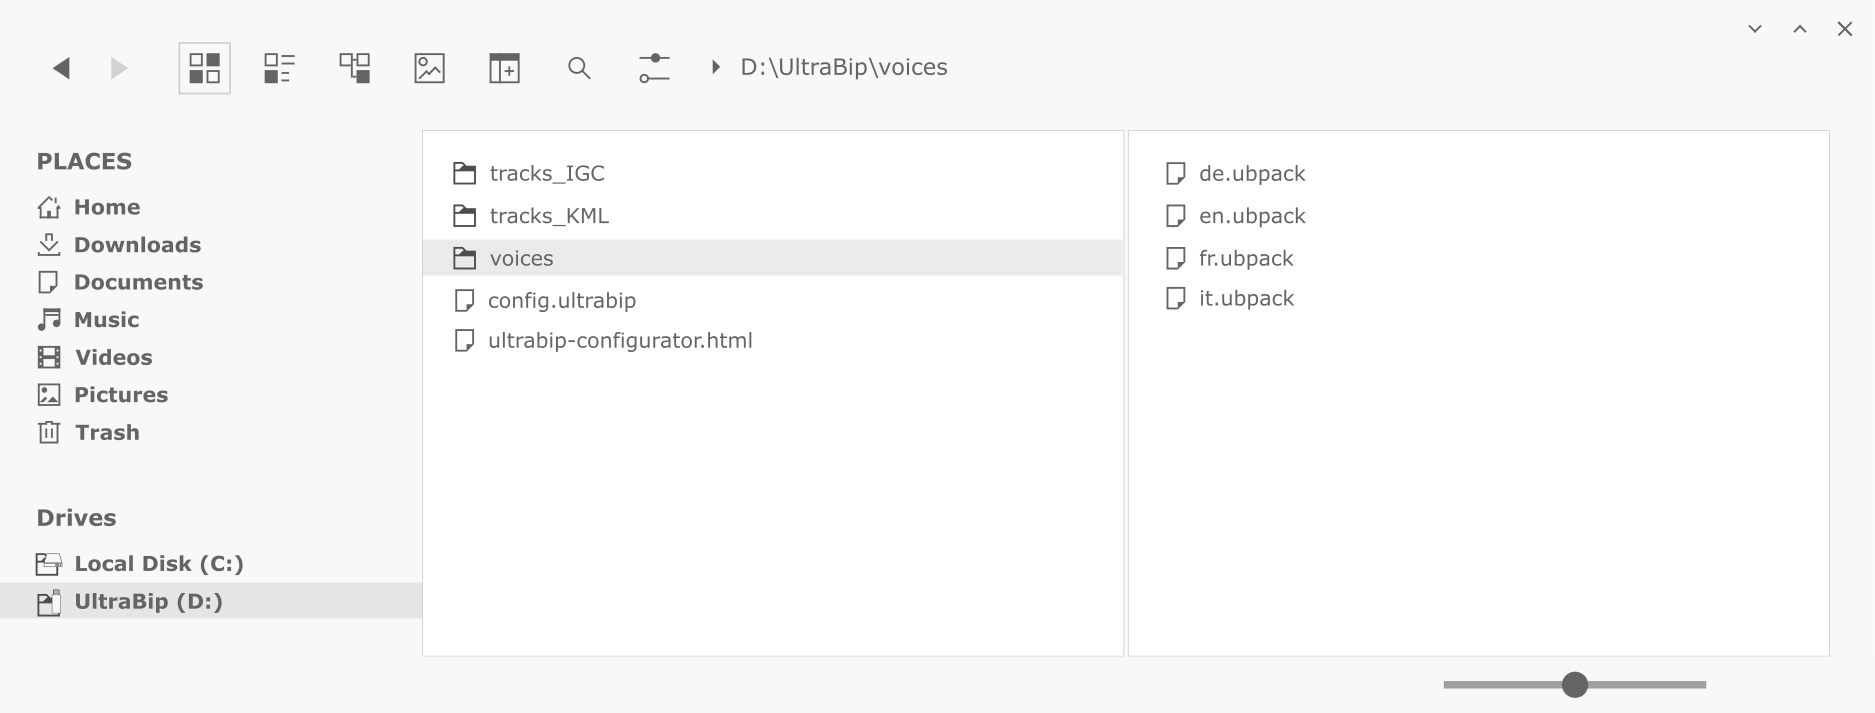
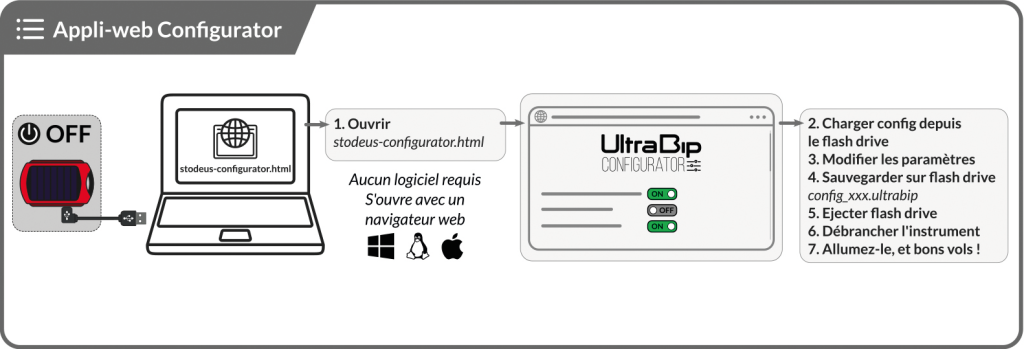
Lorsque vous branchez l’UltraBip à votre ordinateur, il apparaît comme une clé USB dans votre explorateur de fichiers ou finder.
Son arborescence à la racine doit être comme suit :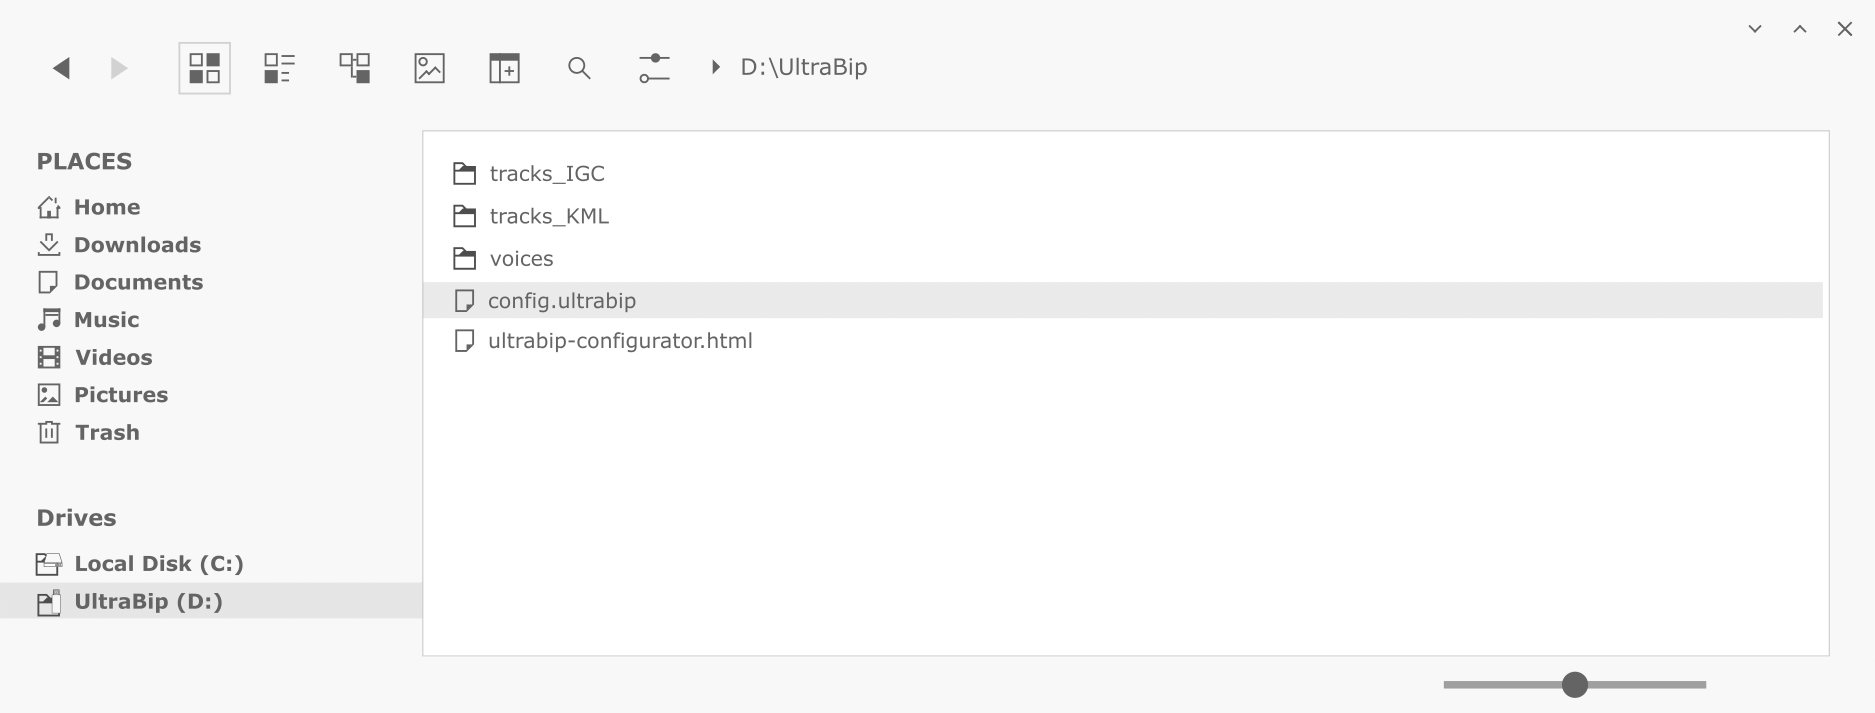
Le dossier “voices” doit toujours contenir au moins un pack de langue. Vous pouvez supprimer les packs de langue que vous n’utilisez pas.
Les dossiers “tracks_IGC” et “tracks_KML” contiennent les traces enregistrées. Elles sont classées comme suit. Le sous-dossier KML “ON_GROUND” contient les mêmes traces KML, mais avec tous les points enregistrés collés au sol. Utile pour les traces faites à pieds.
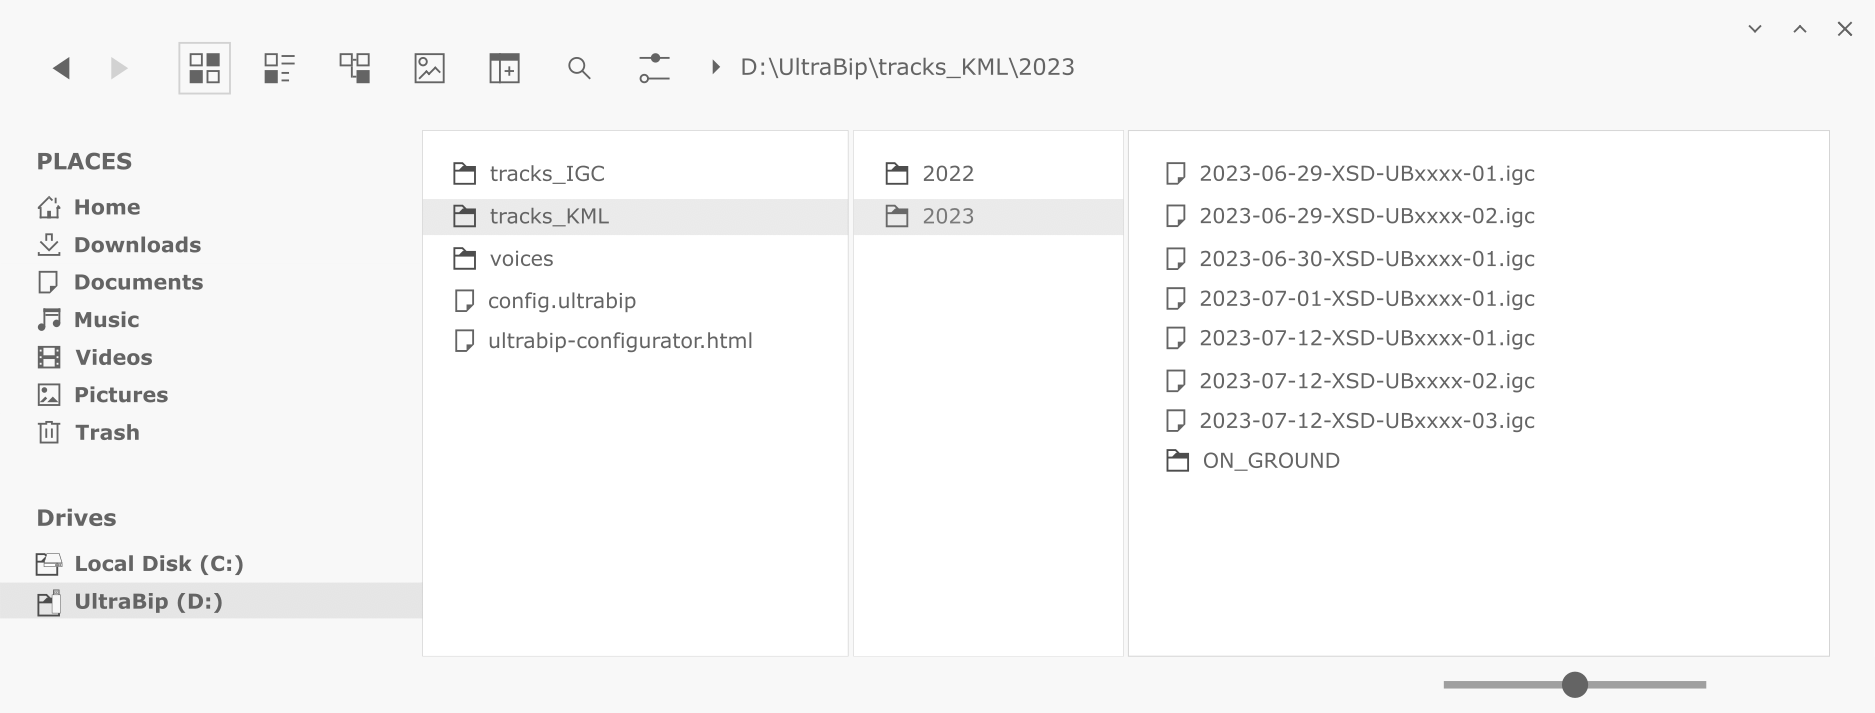
Les fichiers traces peuvent être supprimés si besoin, tant que les dossiers “tracks_IGC” et “tracks_KML” restent.
- Éteindre l’appareil
- Le connecter en USB à un ordinateur
- Ouvrir le Configurator
- Cliquer sur “Charger config”, et suivre les instructions
- Le numéro de version sera visible sous Système > avancé (voir capture d’écran ci-dessous)
